Introduction

Have you ever noticed that almost everything around us is made up of combinations of only a few basic shapes – boxes, cylinders, spheres, cones, and so on? When you look around the room, can you see “boxes” in the furniture, or “cylinders” and “spheres” in the light bulbs? When you look outside, can you see various types of triangles, rectangles, squares, and circles?
The first three learning activities of the course focus on these shapes and how they are used in the design of many things we use every day.
In the first learning activity, you will learn to recognize and name the basic shapes found in everyday objects, from buildings to jewellery. You will learn how to represent these shapes on paper, using various types of drawings.
In the second and third learning activities, you will learn two ways of drawing three-dimensional (3D) objects, and how to create designs for things you might like to build.

Review of basic shapes and solids
Before getting started on basic shapes and solids, take a moment to review some important geometric terminology and concepts.
It’s a good idea to practise drawing using pencil and paper (rather than electronic tools), as you will need to draw on paper when you take the final exam. In this learning activity, you will require three tools to help you draw diagrams:
- a sharp pencil for drawing accurate diagrams
- a 30 cm clear plastic ruler for drawing straight lines
- a protractor for drawing and measuring angles
Geometry review
Watch the following video, “Complementary and supplementary angles.” It uses a house under construction to teach you some great tricks for remembering angle terminology.
Types of angles
The following table summarizes the different types of angles:
| Type of angle | Definition | Diagram |
|---|---|---|
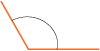
| Acute | Less than 90° |

|
| Right | 90° |

|
| Obtuse | Greater than 90° but less than 180° |
|
| Straight | 180° |

|
| Reflex | Greater than 180° but less than 360° |

|
Alternate angles and the Z-pattern

Interesting things happen when a line – called a transversal – cuts through two parallel lines.

A Z-pattern is formed, creating what are called “alternate angles.” Alternate angles are always equal.
You’ll encounter this Z-pattern in Learning activity 1.5 when you study angles of elevation and angles of depression.
Watch this!
To review some basic geometry, watch the following video, “Drawing angles with a protractor.”
The angles are explementary, in other words they add to 360 degrees.
Watch this!
To review some basic geometric terminology, watch this fun music video, “Turning round the point.”
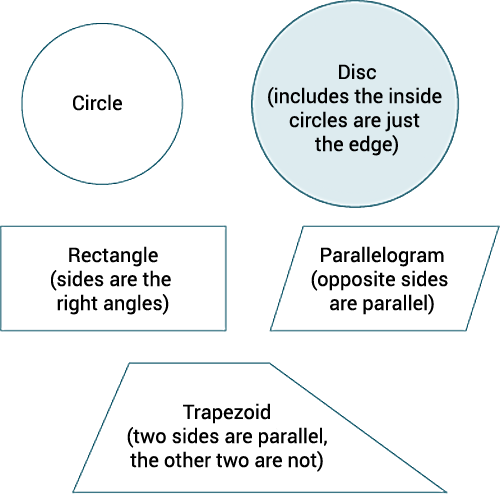
Two-dimensional shapes
You probably already know the names of most of the following shapes.
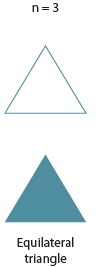
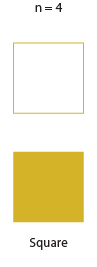
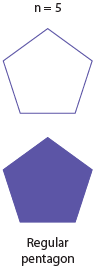
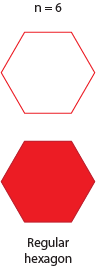
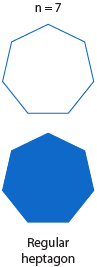
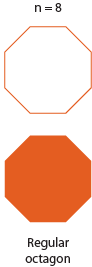
Here are some of the regular polygons, which have sides of equal length. The letter “n” represents the number of sides.
Three-dimensional solids
Let’s do a quick review of some three-dimensional solids you may already be familiar with from past courses or experience. Click on each of the three tabs below.
Note: There are other, more complicated shapes, but you won’t be learning about them in this course.
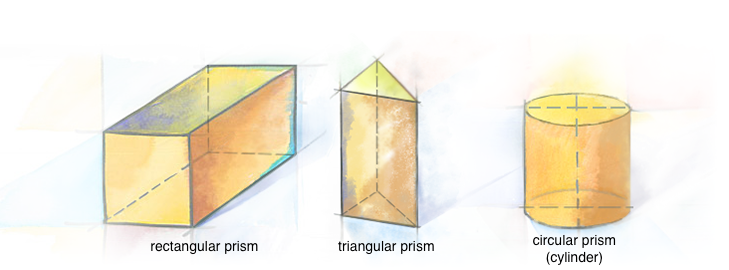
Prisms are objects that have a top, a bottom (or base), and sides. The faces of the sides are parallel with each other. They are named by the 2D shape of their bases.
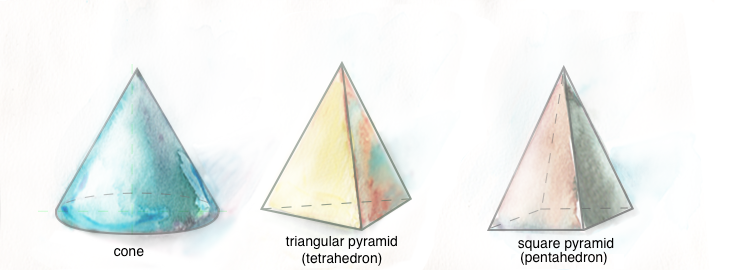
Cones and pyramids have a base, but not a top. Instead, the sides come together to form a point. Cones have circular bases. Pyramids can have any polygon as a base and are named by the shape of their base.
Cones and pyramids have a base, but not a top. Instead, the sides come together to form a point. Cones have circular bases. Pyramids can have any polygon as a base and are named by the shape of their base.
Practise what you have learned
Name the following shapes. Try to do this without looking back in this learning activity or consulting your notes.

disc

hexagon
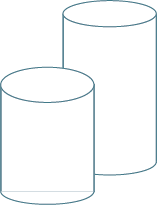
circular prisms or cylinders
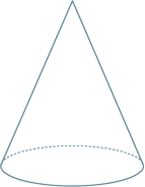
cone

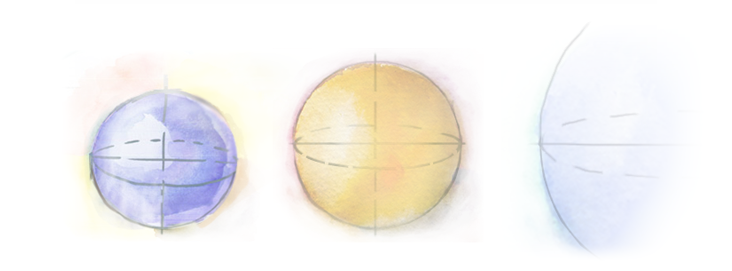
sphere
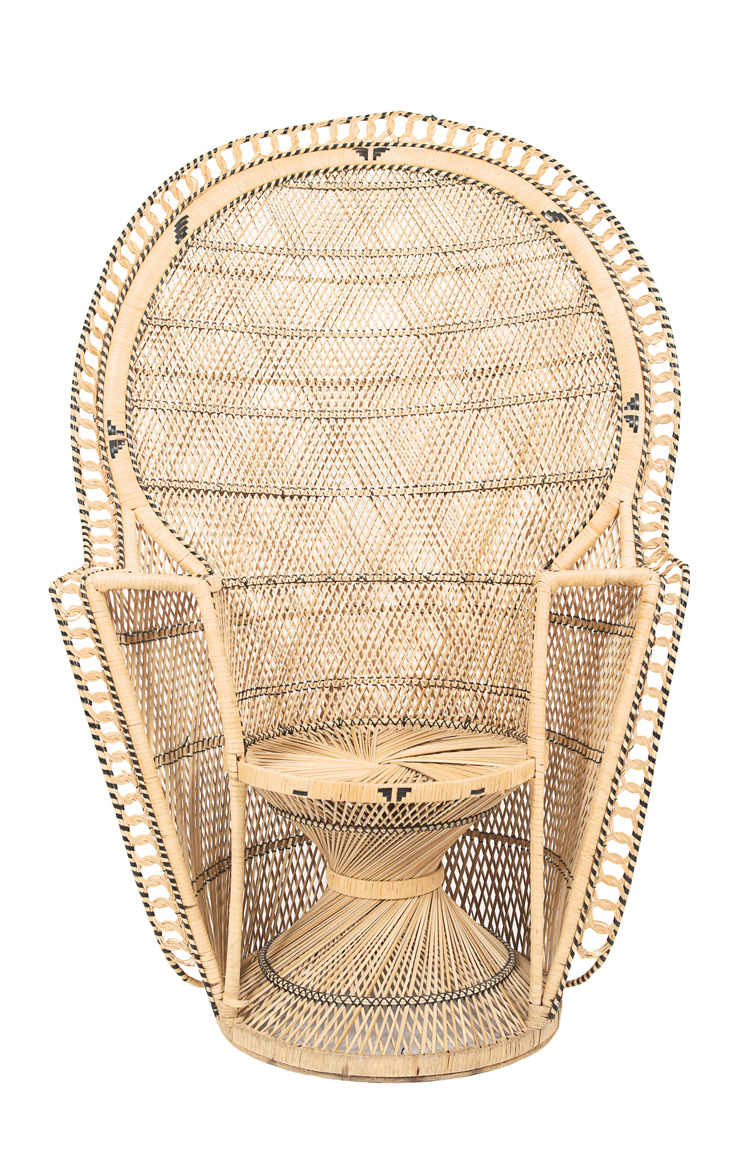
Examples of geometry in various objects
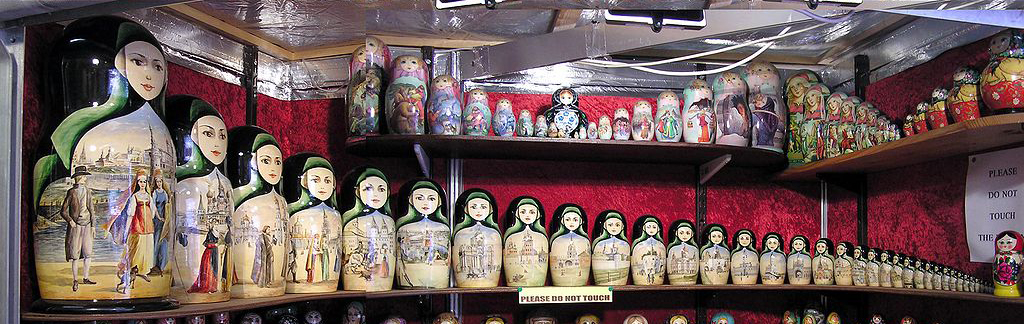
Geometry is all around us.
Below are pictures of six objects you might see around you. Can you spot a pyramid? A pentagon? A sphere? A triangle? A rectangular prism? A semi-circle?


Here are some questions you might have about the objects around you:
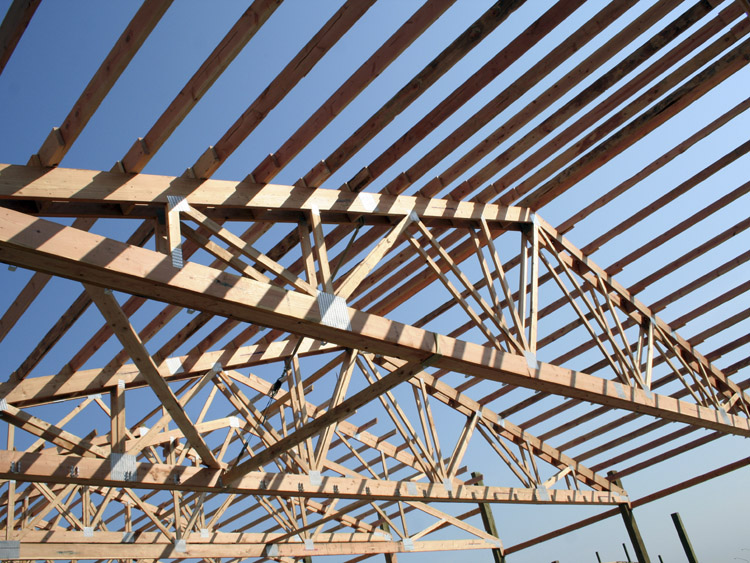
- Why are triangular braces used in roof trusses instead of rectangular ones?
- Why are cans that contain the same amount sometimes different in height?
- Why are some transport trailers shaped like boxes, and others like cylinders?
The answers to these questions are related. When you build an object, you must always balance out three important factors:
- Structure (how strong and durable it is)
- Cost (how cheaply it can be made)
- Aesthetics (how attractive it looks)
If these are not balanced in the design of an object, you may be in trouble!
For instance, you probably wouldn’t take the time to design and build something if it wasn’t strong enough to last. You most likely wouldn’t buy an ugly car, no matter how inexpensive. And few people can afford to build something strong enough to withstand every possible disaster.
Of course, in certain circumstances, some considerations are more important than others. Companies won’t spend vast sums of money designing packaging that consumers throw out. However, if you are an artist building a sculpture, aesthetics are obviously very important.
Here are some basic principles to consider:
- Things with straight lines and right angles are the most inexpensive to build. This is why houses and furniture are mostly “box-like.”
- Triangles are the strongest straight-line shapes. A rectangle can be pushed sideways into a parallelogram, but a triangle can’t be bent out of shape without breaking one of the sides.

- Circular containers are stronger than containers with corners. This is why propane tanks are round.
- Circular containers hold the most volume with the least amount of building material. This is why most cans are shaped like cylinders. They use less material, so they’re cheaper to make.
Scale diagrams
Obviously, very few things can be drawn “life-sized” on a sheet of paper. Most objects must be reduced in size to fit the paper, or enlarged (magnified) so details can be seen.
Any drawing that is the same shape as a real-life object, but is reduced or enlarged in size, is called a scale diagram.
When drawing scale diagrams, remember that the angles in the drawing must be the same size as those in the object. Only the dimensions of the object change. These include length, width, height, slanted lines in angular diagrams, and diameter in circular diagrams.
All lengths and widths must change in exactly the same way. They are either multiplied or divided by the same number. That number is called the scale. For example, a drawing of a grasshopper that is exactly life-size would be called a “full scale” or “1:1” drawing. A drawing at half size would be 1:2 scale. A double-sized drawing would be 2:1 scale.
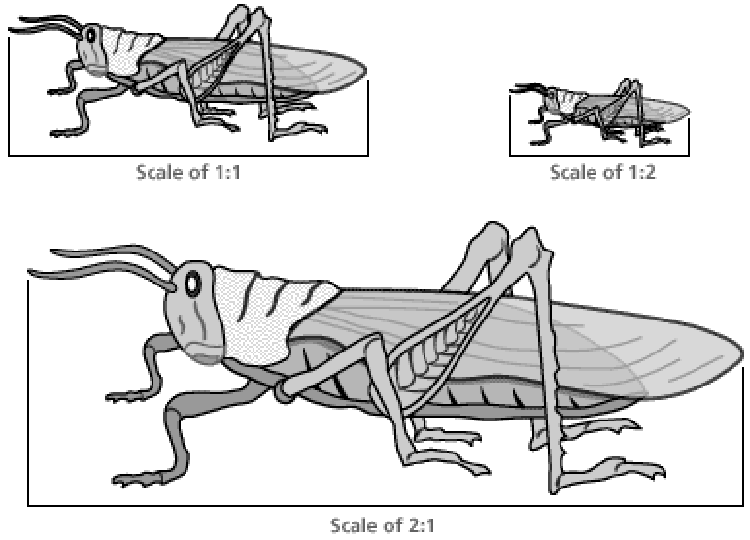
Imagine that you were asked to draw the grasshopper with the scale of 3:1. You would make every dimension on the drawing three times the size of the real-life grasshopper.
Note: When you read “3:1,” pronounce it as “3 to 1.”
The scale in magnification drawings (where the drawing is bigger than the object) is written in the form n:1, where n represents the size of the magnification, or the number that all dimensions in the real-life object must be multiplied by.
The scale in reduction drawings (where the drawing is smaller than the object) is written in the form 1:n, where n represents the size of the reduction, or the number you must divide all measurements by. So for example, if the scale of a drawing is stated as 1:4, this means that every dimension of the drawing is ¼ the size of the real-life object.
Example
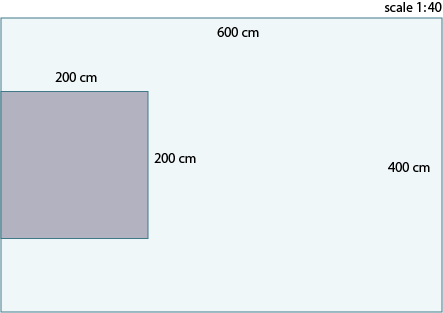
Suppose a bedroom is 600 cm × 400 cm, and there is a 200 cm × 200 cm king-sized bed against the middle of the shorter wall. Draw a scale diagram, using a scale of 1:40.
Solution
Because the scale is in the form 1:n, the diagram will be smaller than the real-life object. Therefore, all measurements must be divided by 40.
Bedroom length = 600 cm ÷ 40 = 15 cm
Bedroom width = 400 cm ÷ 40 = 10 cm
Bed length (and width) = 200 cm ÷ 40 = 5 cm
Since the shorter wall on the scale diagram is 10 cm in width, and the bed is 5 cm, there is a difference of 5 cm that is not accounted for on the shorter wall. This must be divided in half to represent the space on each side of the bed. Therefore, the space on each side of the bed will be 5 divided by 2, which is 2.5 cm in length.
The drawing will look like this:
Orthographic drawings of 3D objects
When we try to draw a three-dimensional object on a two-dimensional piece of paper, we encounter two major problems:
- No matter how we look at the object, we can’t see all the sides at the same time. Something is always hidden in a single drawing.
- If we use an artistic “trick” to make the drawing look three-dimensional, the angles on the drawing won’t match the angles on the object, so it’s no longer a scale drawing. (We will discuss this topic in more detail in Learning activity 1.2.)
Dealing with the first problem is easy. If we can’t see all of the sides on a single drawing, we can draw three views of the object – one from the front, one from the side, and one from the top. This is called an orthographic drawing.
In orthographic drawings, there may still be hidden features in each of the three views. These are indicated by dotted lines, while the features we do see are represented by solid lines.
Watch this!
The following video, “Front, Top, and Side Views,” shows you an example of what you will see in the front, top, and side views of an orthographic drawing.

Practise what you have learned
ΔPQR has been enlarged to produce ΔP’Q’R’. What scale is ΔP’Q’R’? (Hint: It’s a magnification drawing.)
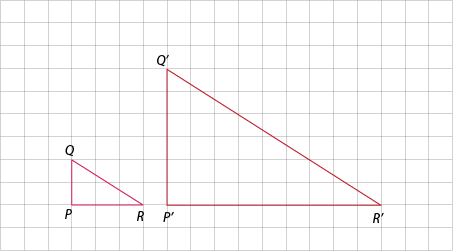
3:1
Diagram A has been reduced to produce diagram B. What scale is pentagon B? (Hint: It’s a reduction drawing.)

1:3
Using paper and pencil, create an orthographic drawing for the object shown, using a scale of 1:5. When you’re finished, view the solution shown.
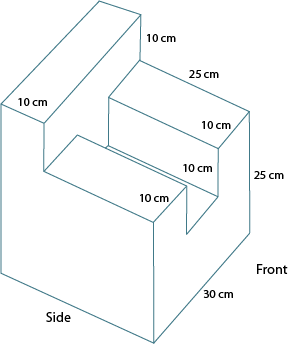
First, draw the front view. You must imagine you are looking straight at the front. What would you see? Make a rough sketch of what you think the front looks like.
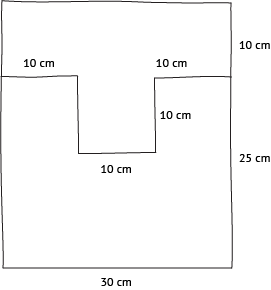
Next you'll make your rough sketch into a proper orthographic front view. Reduce all dimensions by dividing each of them by 5 (the scale). For example, the bottom of the object is 30 cm in length. However, when it is divided by 5, it will be 6 cm in length. Draw your diagram so the bottom of the object is 6 cm long. Calculate the appropriate measurements for each of the other dimensions.
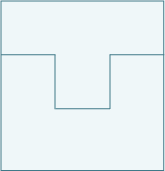
Scale 1:5
Next, draw the top view.
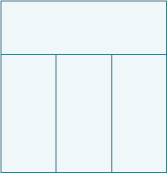
Scale 1:5
Finally, draw the side view. Don't worry about the slot for now.
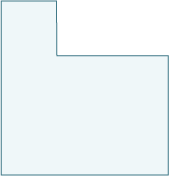
Scale 1:5
Wait, the side view isn't quite finished! Do you remember the slot? You can't see it in the side view, but you know it's there! Since it's hidden, use a dotted line to represent it in the final side view.
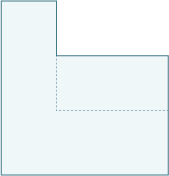
Scale 1:5
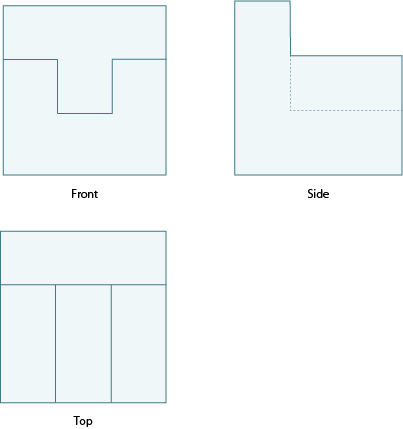
If we put all three views together, we have the finished orthographic drawing.
Notice the positioning. The front view is on the top left, the side view is beside it on the right, and the top view is below the front view. This is the standard way of presenting an orthographic drawing.
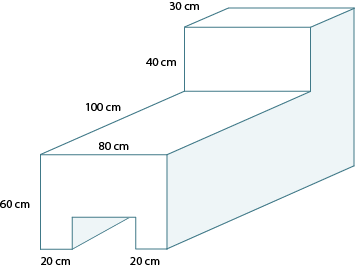
Create orthographic drawings for the following object, using a scale of 1:10.
Tip: Don’t forget to include dotted lines if there are any hidden edges.
The tunnel is 20 cm high and goes entirely through the object.
Once you’ve completed your work, compare your drawing to this “Sample orthographic drawing (Opens in new window).”